The file manager
The file manager is the main screen of the WebClient, reached through the Files link in the top navigation. It shows the contents of your space and lets you browse, upload, download, organize, and (when allowed) share files and folders. It is built to stay fast and responsive even in folders that contain hundreds of thousands of items.
Navigating folders
A breadcrumb trail runs along the top of the page. It starts with Home and grows one step for each folder you open, so you always know where you are.
- Select Home to jump back to the top of your space.
- Select any step in the trail to jump back to that folder.
- Open a folder by selecting it in the listing.
- Use the refresh button next to the breadcrumb to reload the current folder.
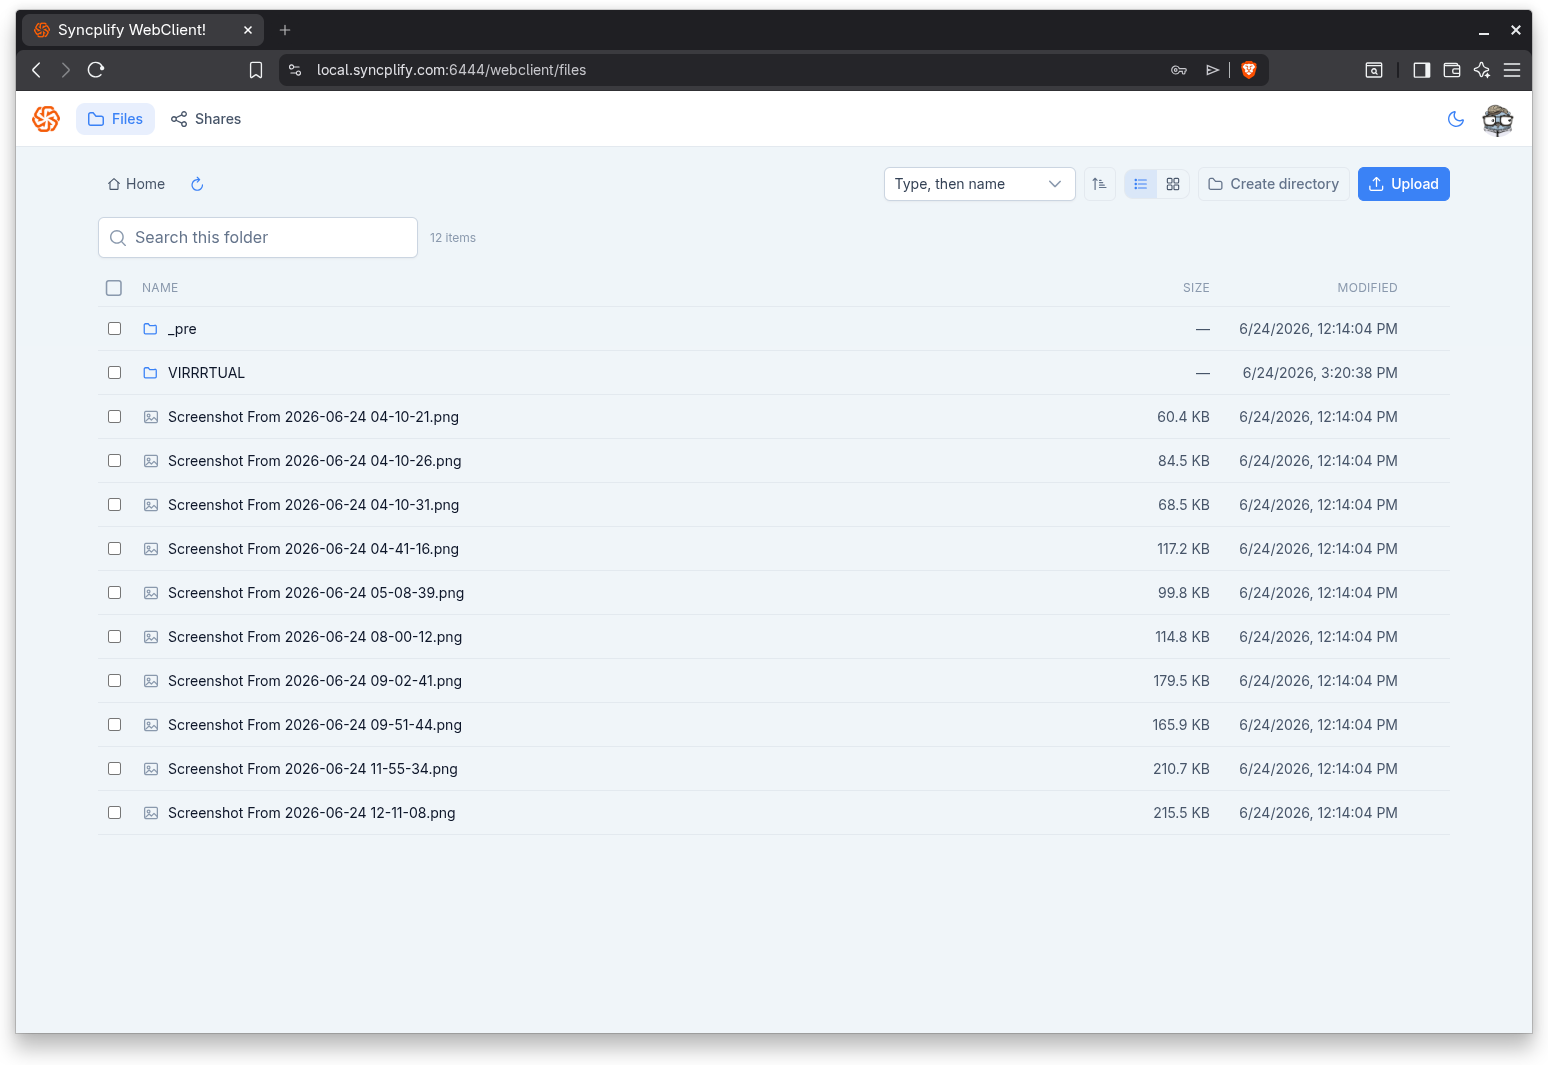
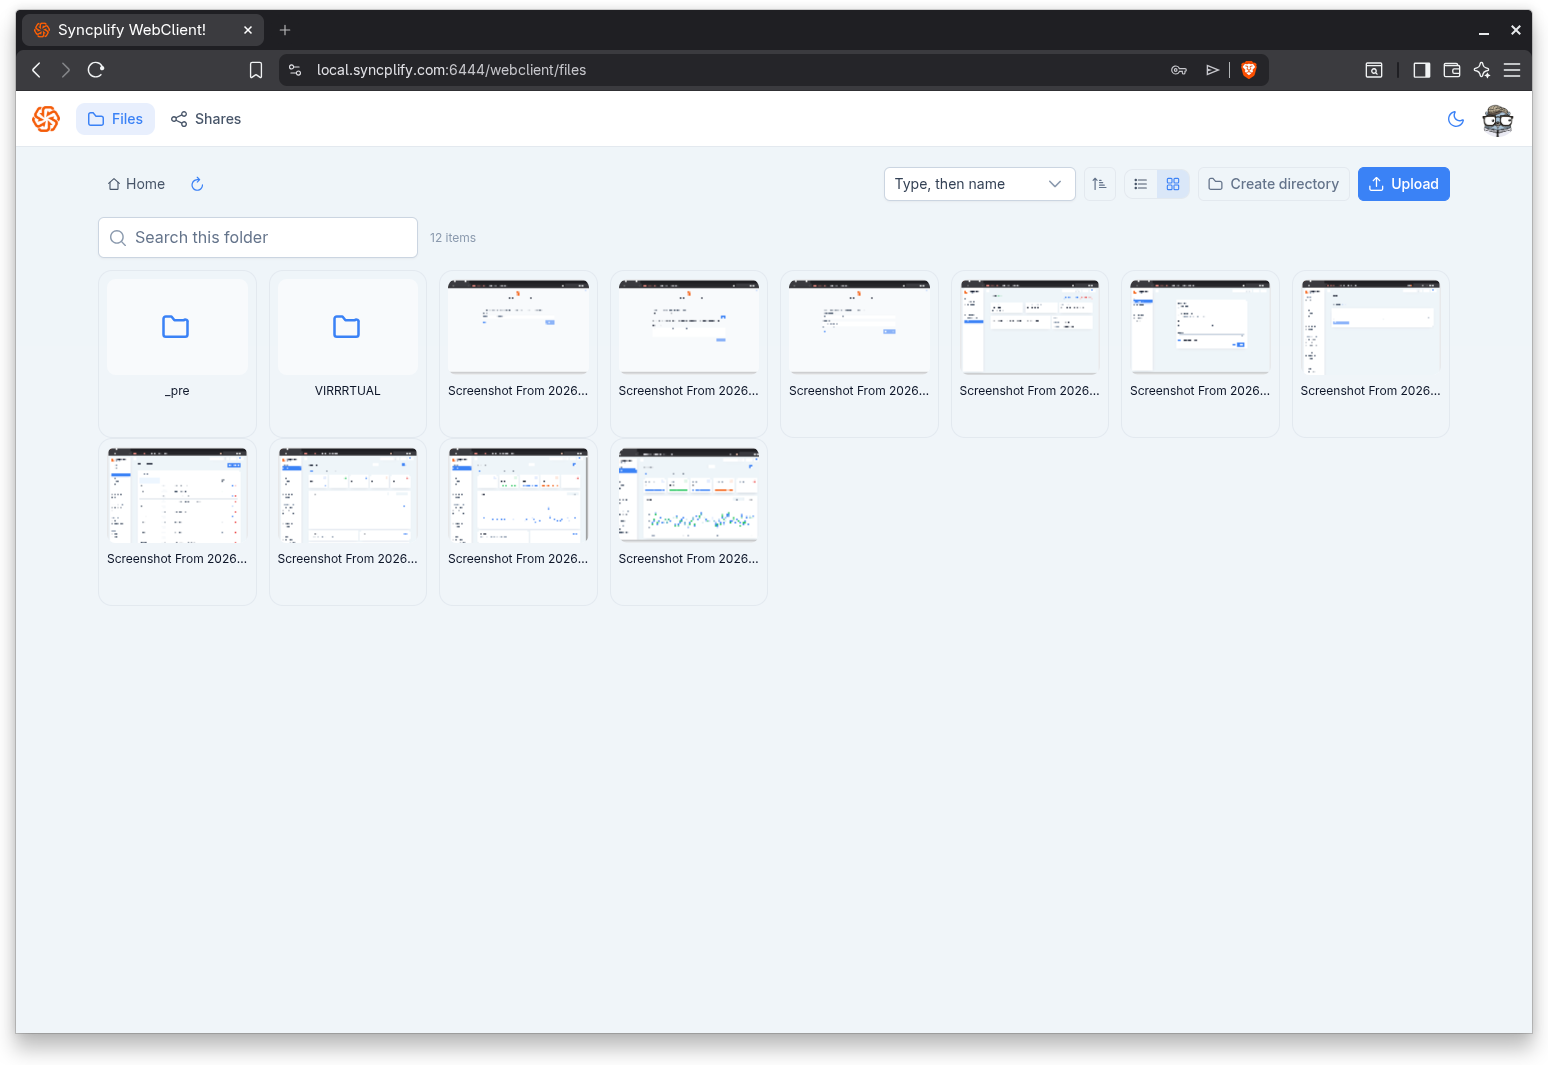
List view and grid view
A pair of buttons near the top right switches between two ways of viewing the folder:
- List view shows items in rows with Name, Size, and Modified columns. It is best for scanning many items and for sorting by column.
- Grid view shows items as cards with thumbnails for image files. It is best for visual browsing of pictures and documents.
Your choice is remembered as you move between folders.
Searching and counts
A search box lets you filter the current folder by name as you type. A small counter shows how many items are in the folder, or how many match when a search filter is active.
Sorting
You can sort the listing in two ways:
- Use the Sort selector and the direction button near the top right. You can sort by Type then name, Name, Size, or Modified, in ascending or descending order.
- In list view, select a column header (Name, Size, or Modified) to sort by it. Selecting the active column again flips the direction. An arrow indicates the active column and direction.
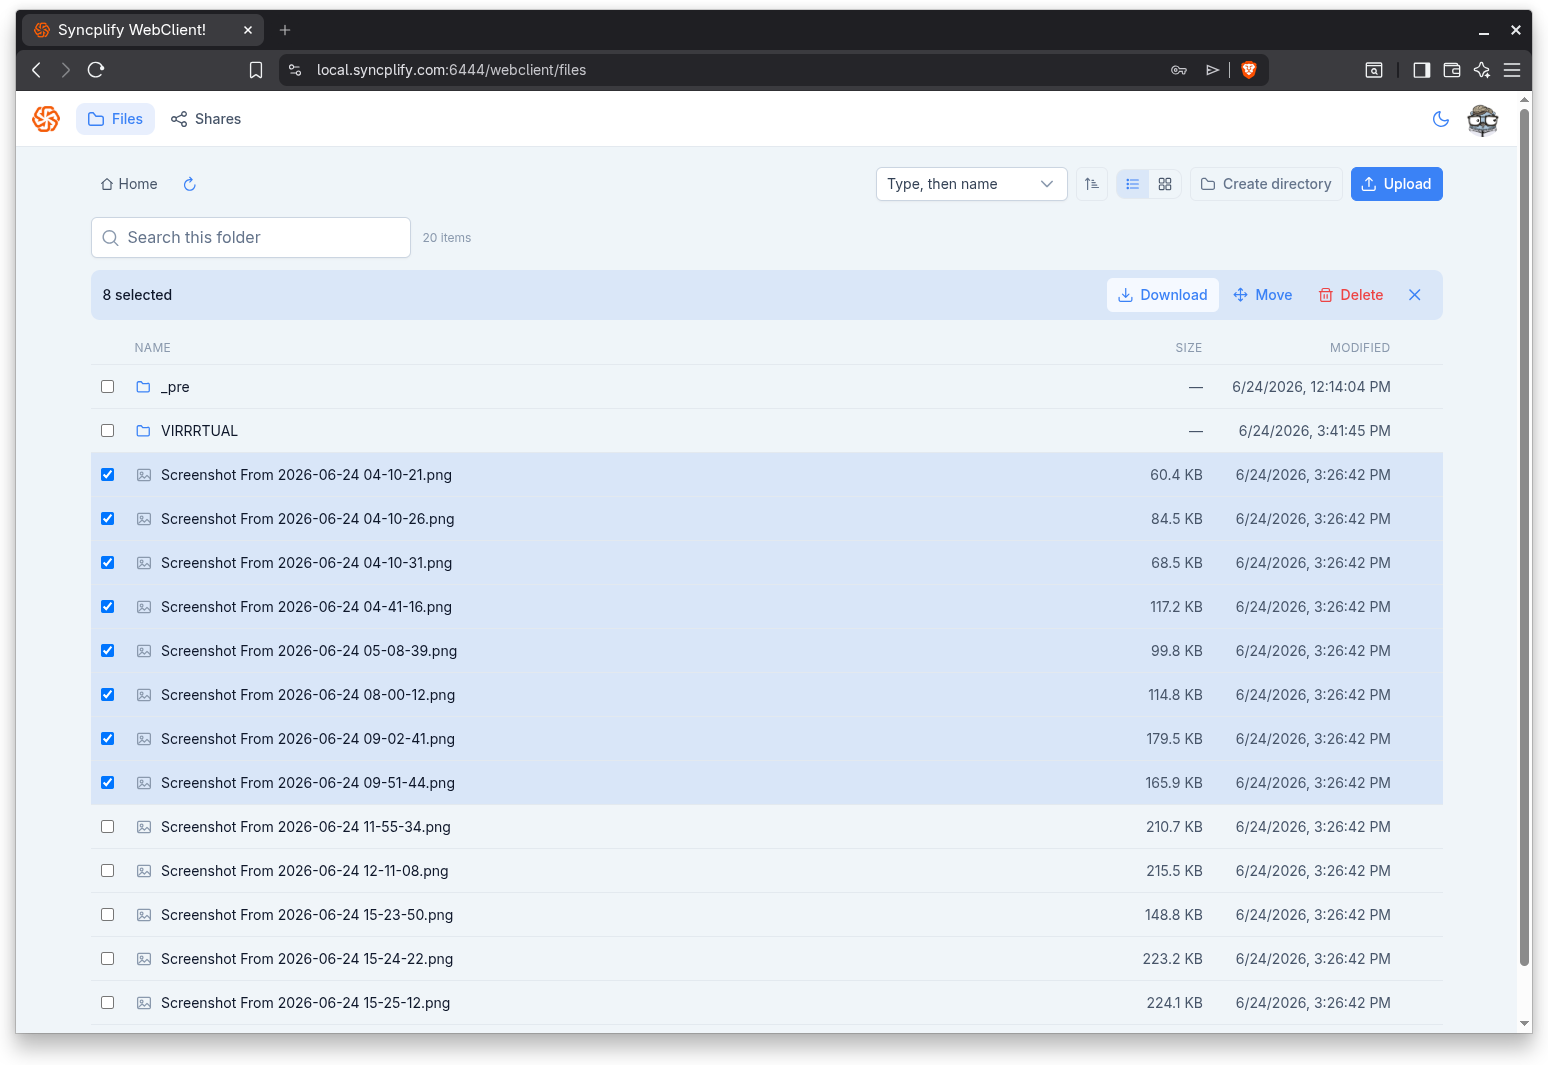
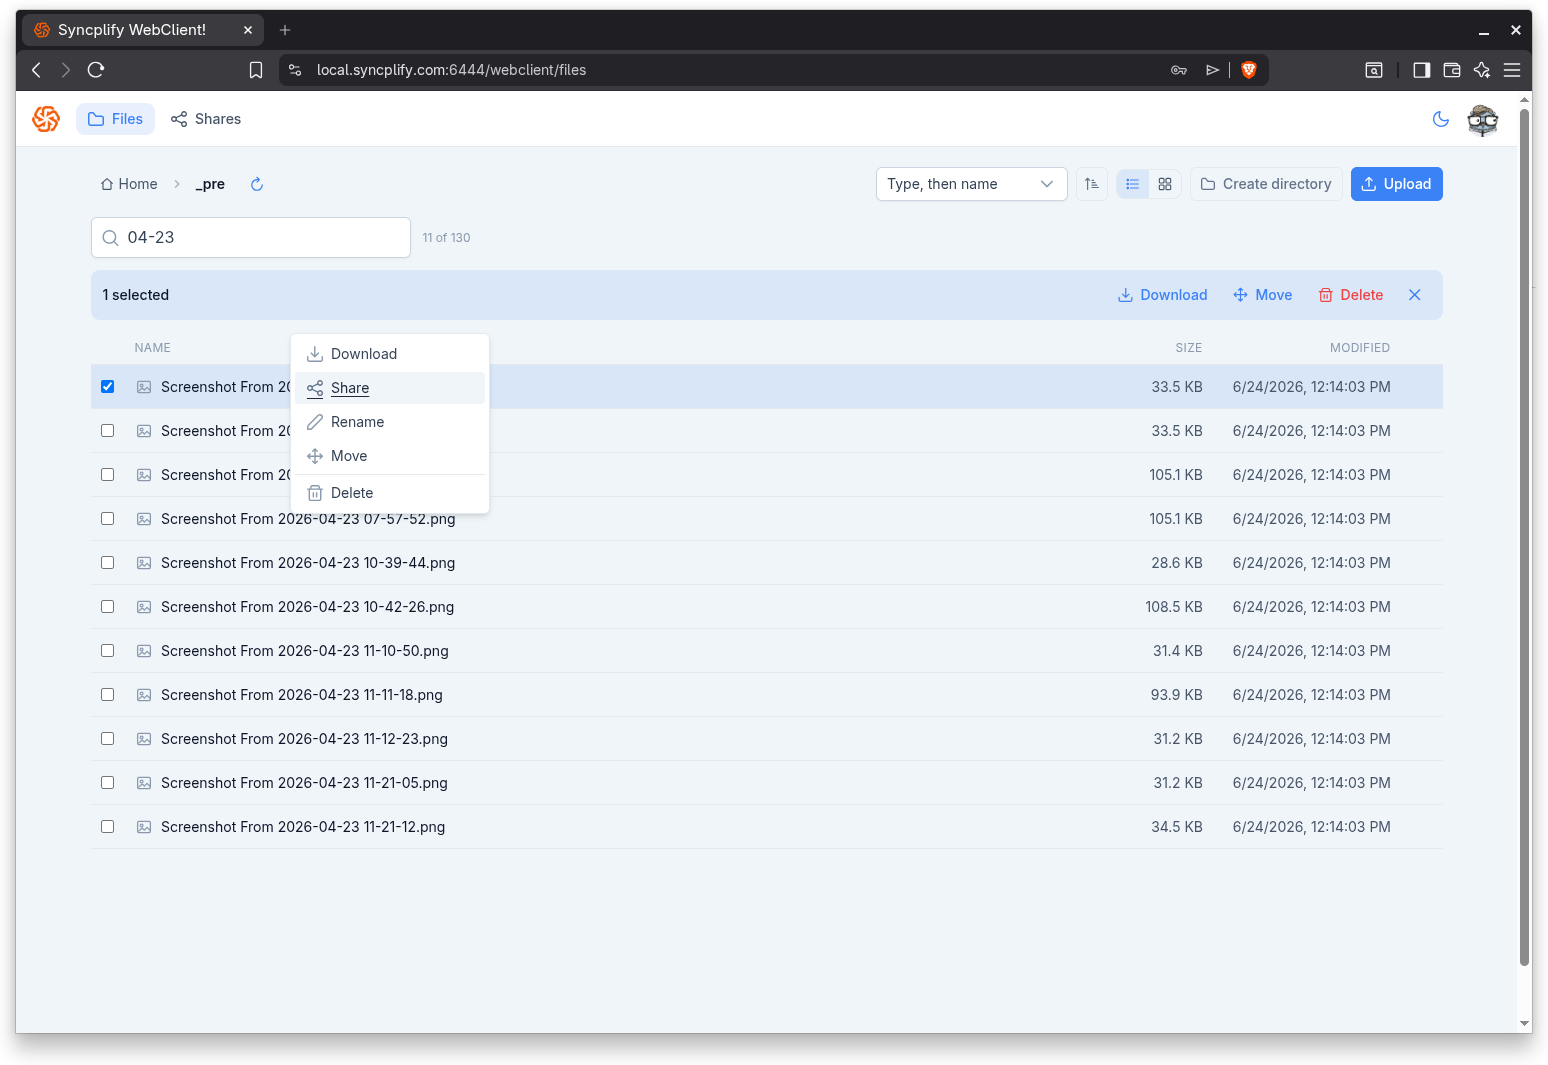
Selecting items
Each row and card has a checkbox.
- Select one or more items by their checkboxes to act on them together.
- The selection control at the top of the list opens a menu with options to select everything in the folder, select all of the currently loaded items, select all folders, or select all files.
When one or more items are selected, a bulk action bar appears showing how many items are selected and offering the available actions: Download, Move, and Delete. A close button clears the selection.
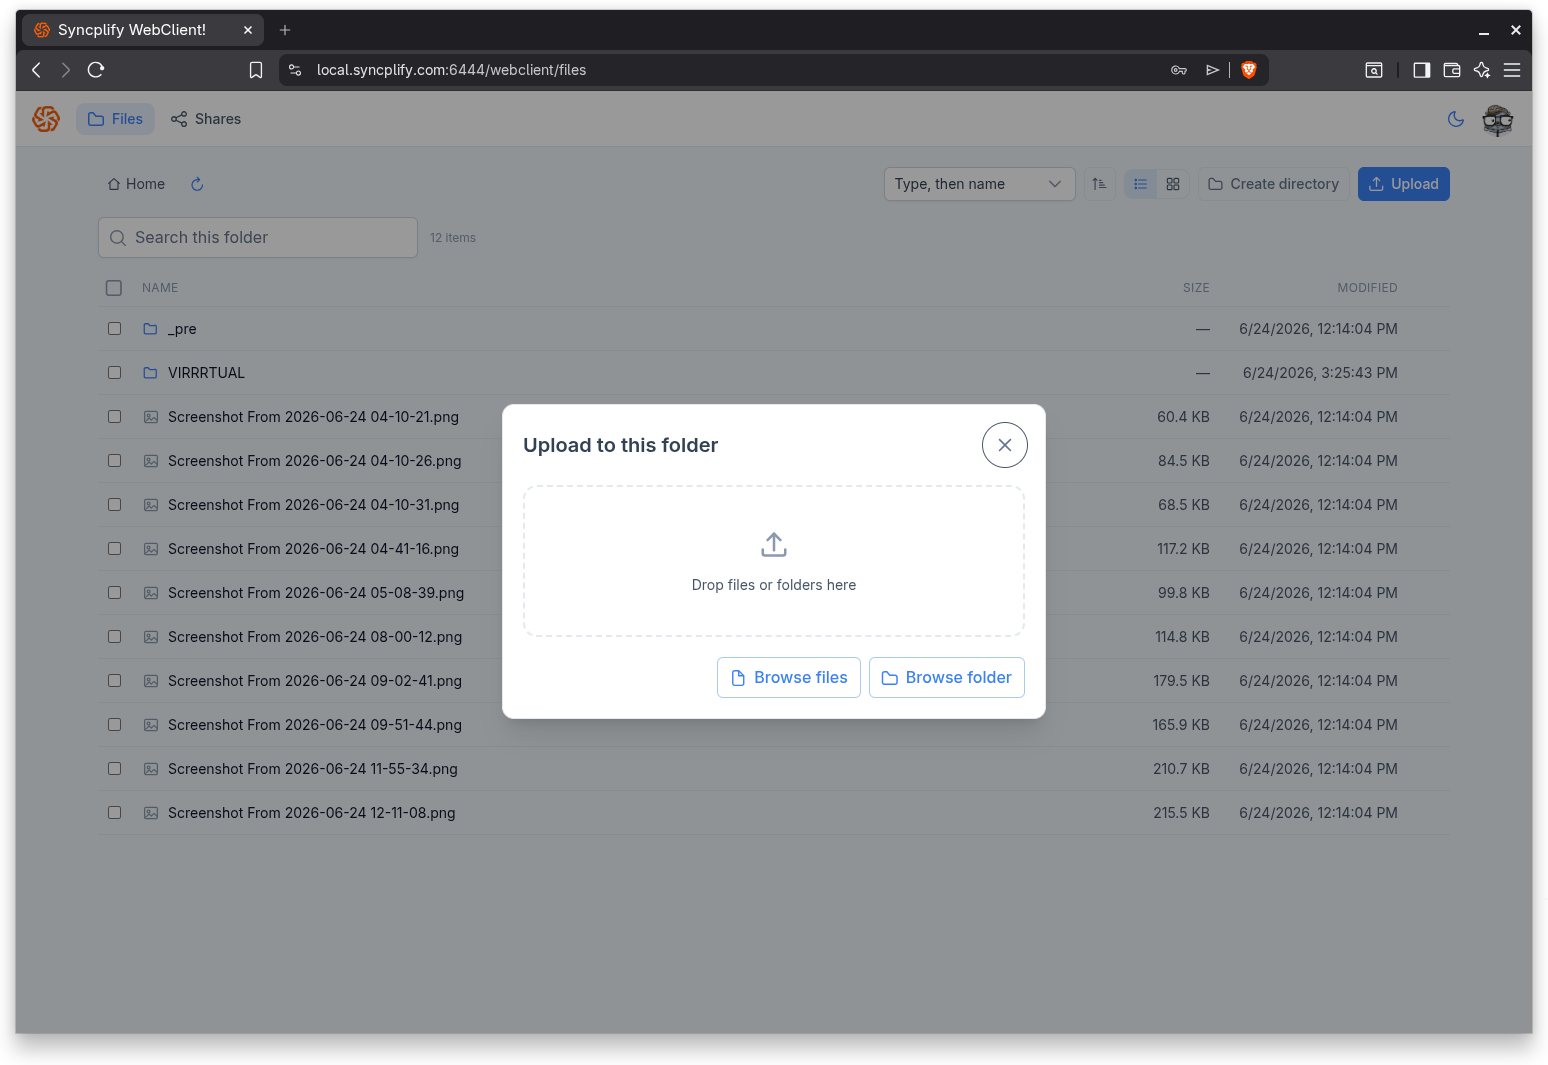
Uploading
Select Upload to open the upload dialog. You can:
- Drag and drop files or whole folders onto the drop area.
- Browse for files with Browse files.
- Browse for an entire folder with Browse folder.
If the administrator has configured an upload disclaimer, it is shown inside the dialog. Files larger than the maximum upload size configured on the server are rejected, and the WebClient tells you which file was too large. Uploads run in the background and their progress is shown in an upload tray.
Downloading
There are several ways to download:
- Open a single file from the listing to download it.
- Use Download from a file's context menu.
- Select one or more items and use Download in the bulk action bar.
When you download more than one item, or a folder, the WebClient packages everything into a single zip file.
Download ZIP and its limit
The administrator can set a maximum number of files that a single zip download may contain. When your selection is within that limit, the Download action works normally. When the selection is over the limit, the button is shown but disabled, and hovering over it reveals a tooltip explaining that there are too many files for a single zip download and asking you to select fewer items. Selecting the whole folder counts every item in the folder against this limit.
Creating a folder
If you have permission to create folders, select Create directory, enter a name, and confirm. The new folder appears in the listing.
Renaming
To rename an item, open its context menu and choose Rename, then enter the new name and save. Renaming is available only when you have permission to rename that kind of item.
Moving
To move items, select them and use Move in the bulk action bar, or use Move from a single item's context menu. Enter the destination folder and confirm.
Deleting
To delete a single item, use Delete in its context menu. To delete several items, select them and use Delete in the bulk action bar. The WebClient always asks you to confirm, because deletion cannot be undone.
The context menu and More actions
Every item offers the same set of actions in two places, so you can use a mouse or the keyboard:
- Right click an item to open its context menu.
- Select the More actions button on the row or card to open the same menu.
The menu lists only the actions you are allowed to perform on that item: Open or Download, Share (when sharing is available), Rename, Move, and Delete.
Read only spaces
If your account has read only access to a space, a small note tells you so, and the actions that would change files (upload, create folder, rename, move, delete) are hidden.
Very large folders
The file manager is designed for folders of any size. Instead of loading every entry at once, it loads only the rows that are currently scrolled into view and fetches more as you scroll. This keeps even a folder with hundreds of thousands of items quick to open and smooth to browse. Bulk operations such as deleting or moving an entire folder are sent to the server as a single request, so they complete reliably no matter how many items are involved.