Choosing the setup type
This is the first step of the wizard. The heading reads "How do you want to setup this node?", and the introduction asks you to choose how to set up this node. Your choice here determines the rest of the flow.
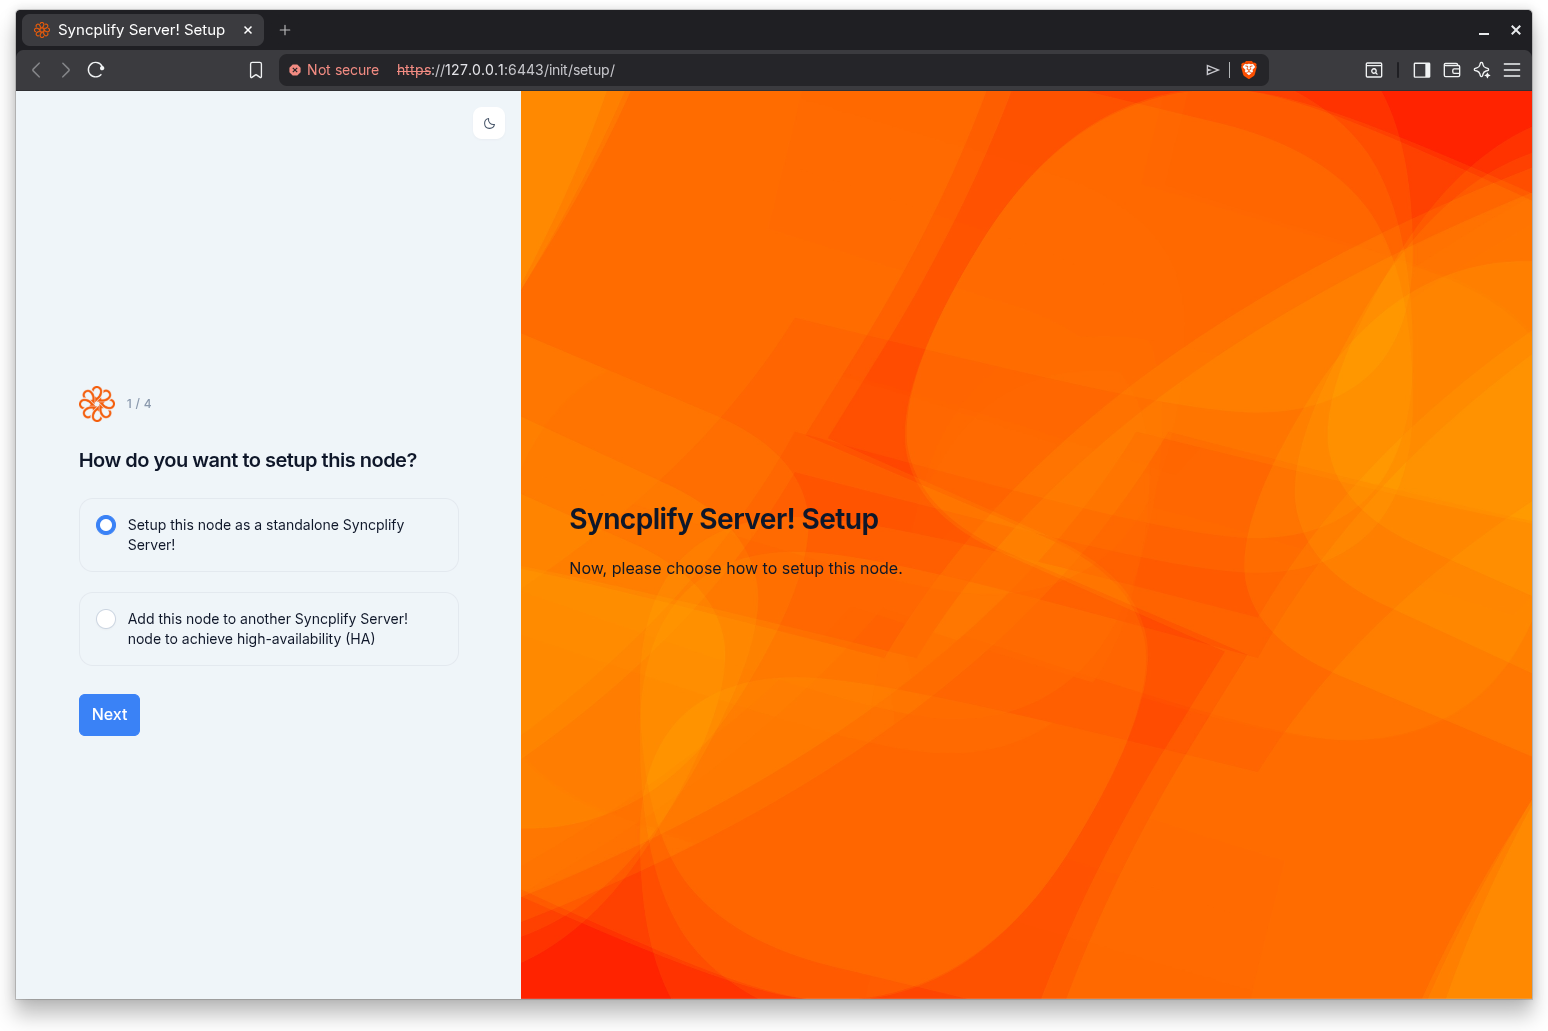
The two options
The step presents two options as selectable cards:
- Setup this node as a standalone Syncplify Server! Choose this to configure a single, self contained server. This is the right choice for most first installations and for any deployment that does not need high availability. Selecting it leads you through creating the first SuperAdmin account on this node.
- Add this node to another Syncplify Server! node to achieve high-availability (HA). Choose this when you already have a running Syncplify Server! node and you want this new node to join it, forming a high-availability (HA) cluster. Selecting it leads you through entering the remote node's address and authenticating as a SuperAdmin on that remote node.
The standalone option is preselected by default.
Which one to pick
If this is your first Syncplify Server! installation, or you are running a single server, choose standalone. You can always extend a standalone deployment into an HA cluster later by installing additional nodes and using the "add" path on those nodes.
Choose the HA option only when there is already at least one running node to join, and you have SuperAdmin credentials for that existing node. For background on high-availability deployments, see the HA Cluster Setup installation guide.
Step indicator
This step shows Step 1 of 4 when the standalone path is the current selection. The number of remaining steps adjusts on the next screen once the wizard knows which path you are following.
Continuing
Select an option and click Next. The wizard proceeds to the node ID step, which is common to both paths.