First-run Setup Wizard
After you install Syncplify Server! and start the service for the first time, the server has no node identity and no administrative account yet.
The GUI or CLI part of the setup will present you with a URL to continue the setup in a web browser. That URL will look something like this:
https://127.0.0.1:6443/init/setupThe very first time you point a web browser at that URL, it presents a web-based Setup Wizard that walks you through the minimum configuration needed to bring the server online: creating the first node and the first SuperAdmin account.
This section documents that wizard screen by screen. It covers what each step asks for, the rules that apply to each field, and the two paths the wizard can take.
When the wizard appears
The wizard is a one-time, first-run experience. It appears the first time a browser connects to a server that has not been configured yet. Once you complete the wizard, the server is configured and the wizard no longer appears; subsequent connections go straight to the SuperAdmin interface.
The wizard does not persist its state between page reloads. This is intentional for a first-run flow: if you reload the page partway through, or navigate directly to a later step without completing the earlier ones, the wizard returns you to the first step rather than rendering a half configured screen. Complete the wizard in a single pass.
What the wizard accomplishes
The wizard performs the smallest set of actions required to make the server usable:
- It assigns this server a node identity (a node ID and an optional description).
- On a standalone setup, it creates the first SuperAdmin account, optionally protected by two-factor authentication.
- On a high-availability (HA) setup, it joins this node to an existing cluster by authenticating against a SuperAdmin on a remote node.
The two paths
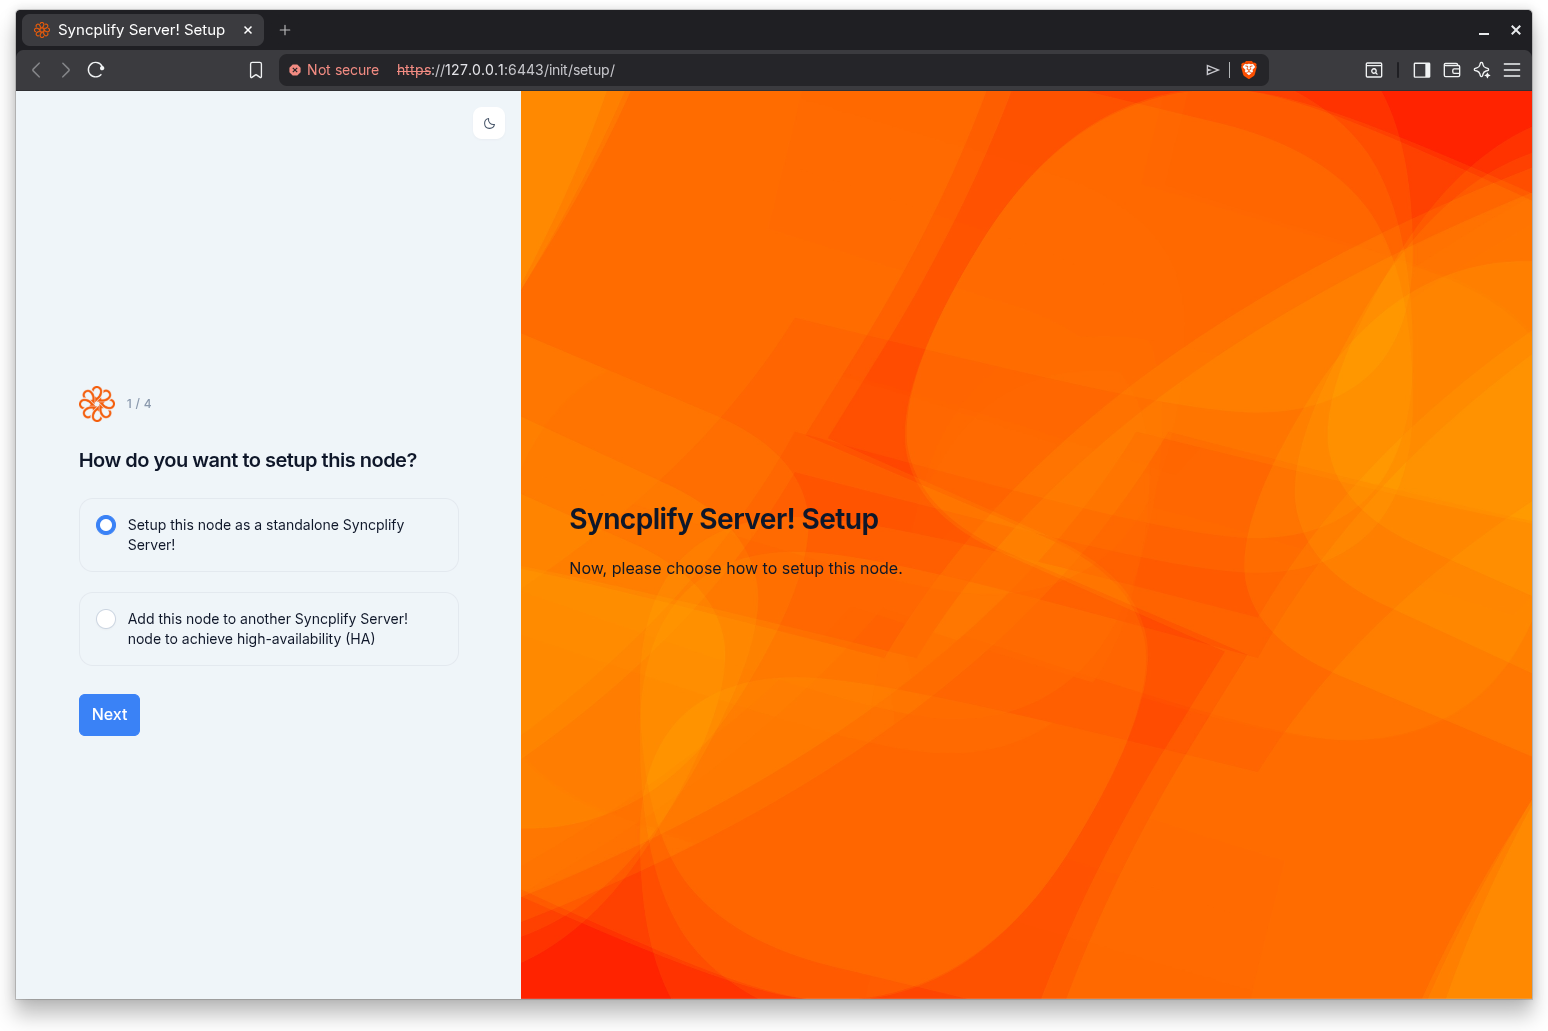
The first step of the wizard asks how you want to set up this node, and your answer determines the rest of the flow:
- Standalone. Set up this node as a single, self contained Syncplify Server!. This path creates the first SuperAdmin account on this node. It is a four step flow: setup type, node ID, SuperAdmin account, and two-factor authentication, followed by a completion screen.
- Add to an HA cluster. Add this node to another, already running Syncplify Server! node to form a high-availability (HA) cluster. This path does not create a local SuperAdmin; instead it authenticates against a SuperAdmin that already exists on the remote node. It is a three step flow: setup type, node ID, and the remote node address, followed by authorization.
See Choosing the setup type for guidance on which path to pick.
The step indicator
Every step of the wizard shows a step indicator in the form Step N of M (for example, Step 1 of 4). The total reflects the path you chose: the standalone path shows four steps, and the HA path shows three steps. The same step indicator is announced to assistive technology when you reach each new step.
The wizard layout
All steps share the same split layout. One side carries the Syncplify artwork and a short introduction to the current step; the other side carries the step indicator, the step heading, and the step's form. A light and dark theme toggle is available at the top of the form rail, so you can switch between light and dark appearance at any point during setup. On smaller screens the layout adapts to a single column automatically.