Creating a New Virtual Site
Syncplify Server! offers two distinct methods for creating a new Virtual Site:
- Simplified Approach: This method requires minimal input and applies standard default settings, ideal for quick setups or users new to the system.
- Detailed Configuration: Designed for expert users, this option allows for precise customization of the Virtual Site to meet specific requirements.
When initiating the process of creating a new Virtual Site, your first decision will be selecting the creation method that best suits your needs and expertise level.
Each method has its advantages:
- The simplified approach is fast and straightforward, often good enough for standard, single-virtual-site deployments.
- The detailed configuration offers granular control, essential for complex or specialized setups, and is highly recommended for multi-virtual-site deployments.
Choose the method that aligns with your goals and familiarity with Syncplify Server! and the various secure file-transfer protocols.
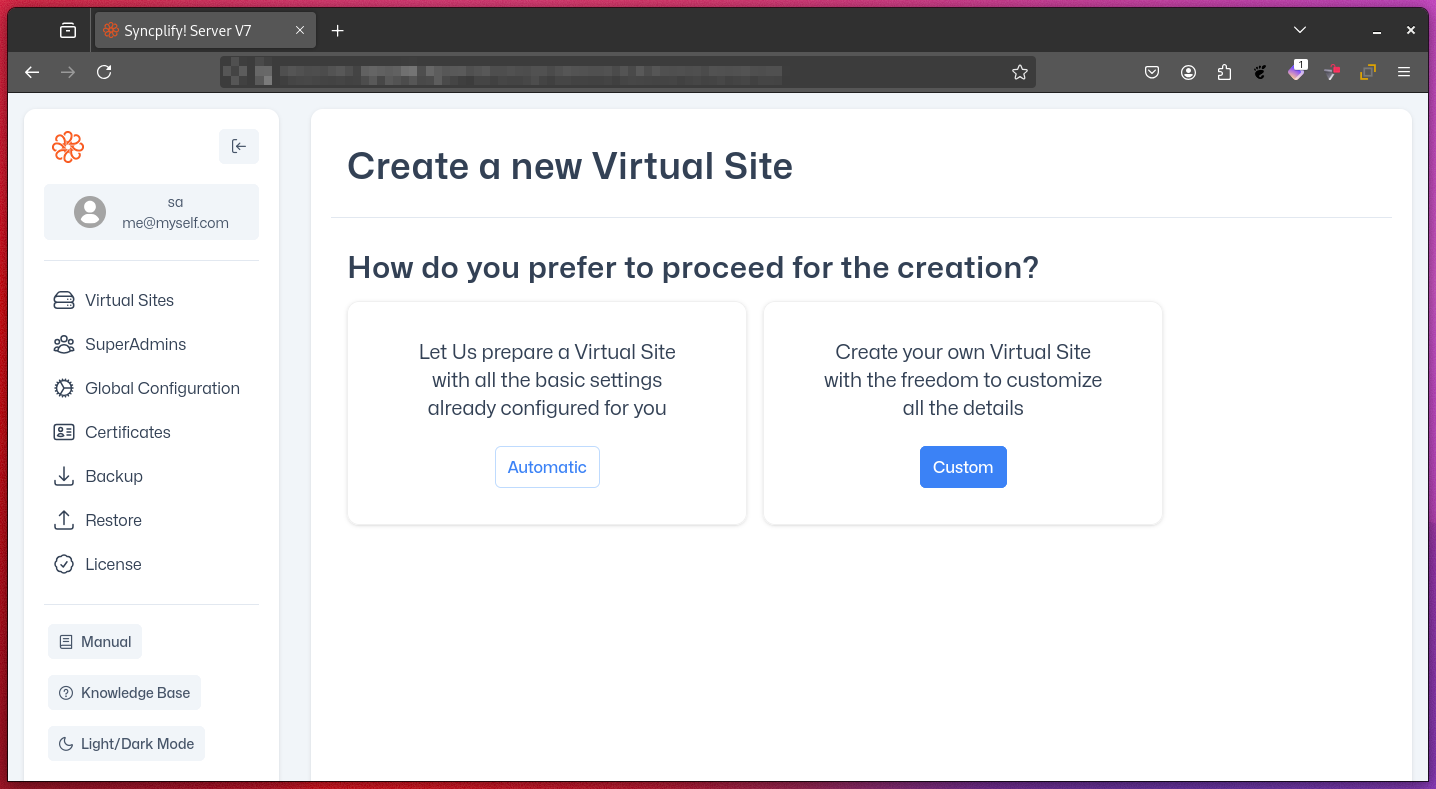
Automatic (with sensible default settings)
Step 1: Minimal Amount of Information
Since this is meant to be an easy "let us do it all for you" way of creating a new Virtual Site, when you choose the Automatic method you only have to provide very little information.
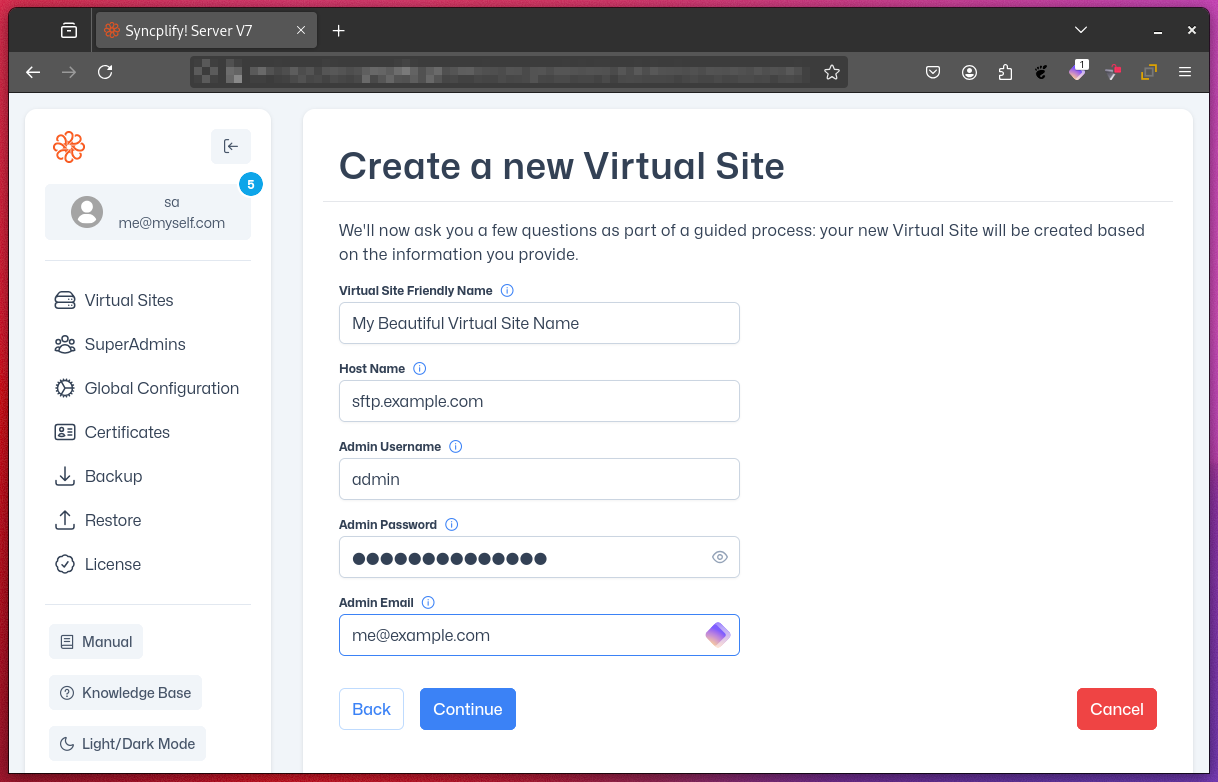
- Virtual Site Friendly Name: A short, descriptive, friendly name for your virtual site (the site ID will be automatically computed for you based on this information).
- Host Name: This is the fully qualified host name, as per the A record pointing to this Virtual Site's IP address(es) you configured in your DNS. An example of a host name could be
sftp.example.com(of course you'd need to use your own domain name). Depending on the protocol used by the file-transfer client, you'll use the host name to create the appropriate URL (e.g.,https://sftp.example.comorsftp://sftp.example.com). - Admin Username: This is the username for the first administrative profile for this specific Virtual Site. Additional administrative profiles can be created at a later time.
- Admin Password: A strong password for your first administrative profile.
- Admin Email: An email address for the administrator to receive notification emails regarding the Virtual Site they manage (notifications work only if SMTP is properly configured).
Step 2: Review and Create
- Review a printable summary of all settings that were chosen for you by this automated procedure.
- Click the CREATE button at the bottom of the page to finalize the creation of the virtual site and its initial Admin profile.
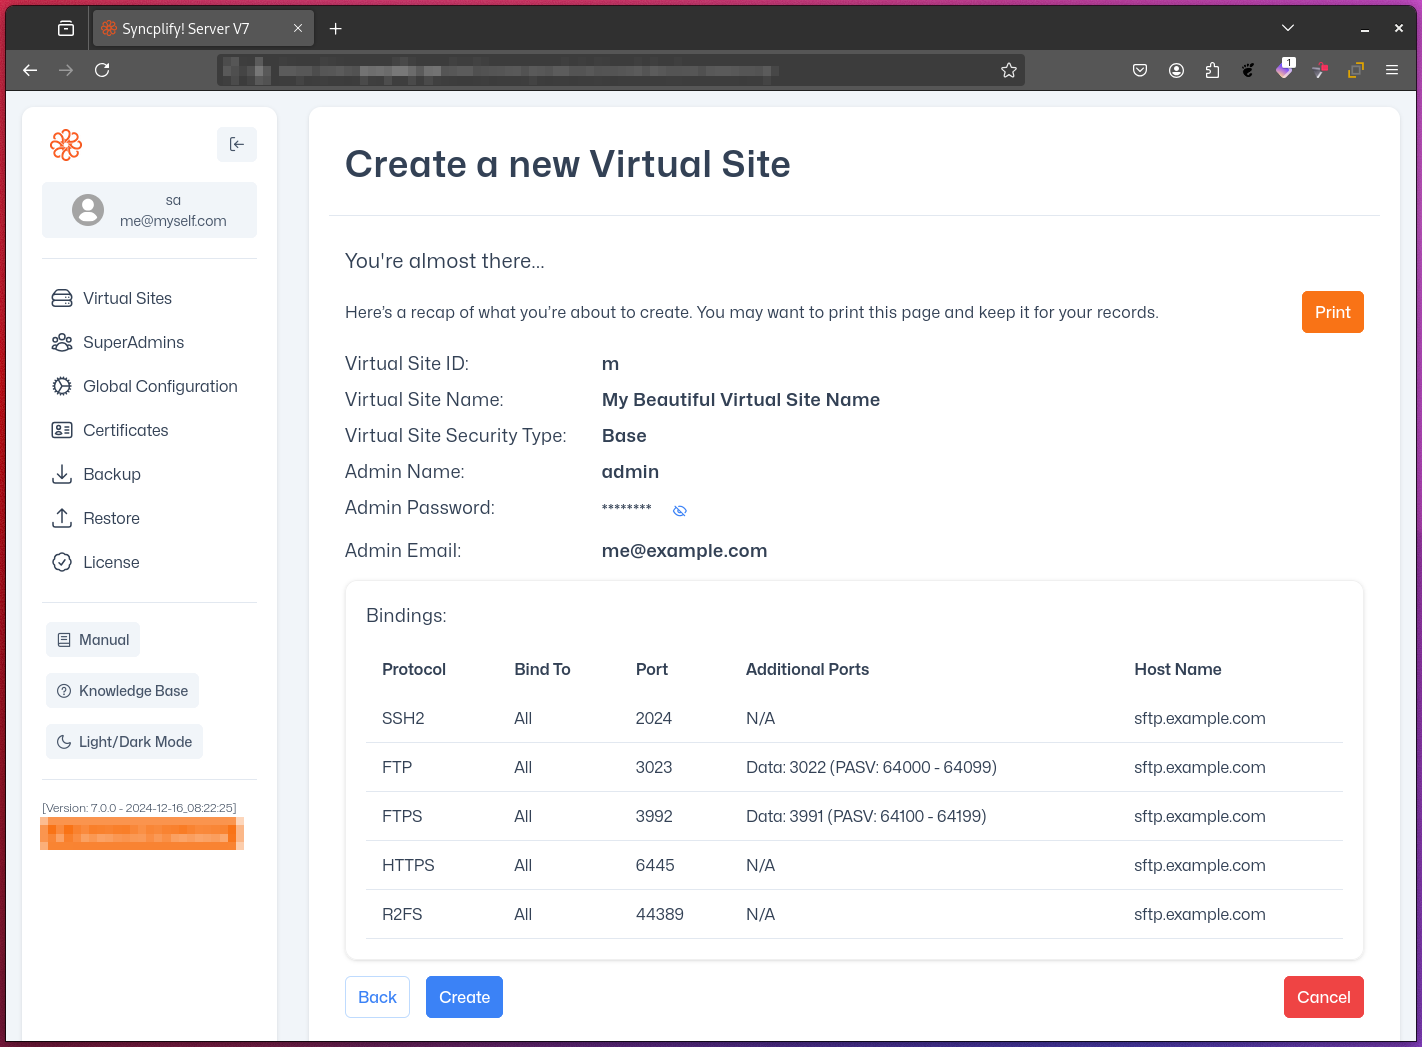
IMPORTANT
It is highly recommended to print this summary page and store it securely for future reference.
Detailed (for experts)
Creating a new virtual site in Syncplify Server! using the detailed process (for experts) involves four key steps:
Step 1: Basic Information
Provide the following essential information:
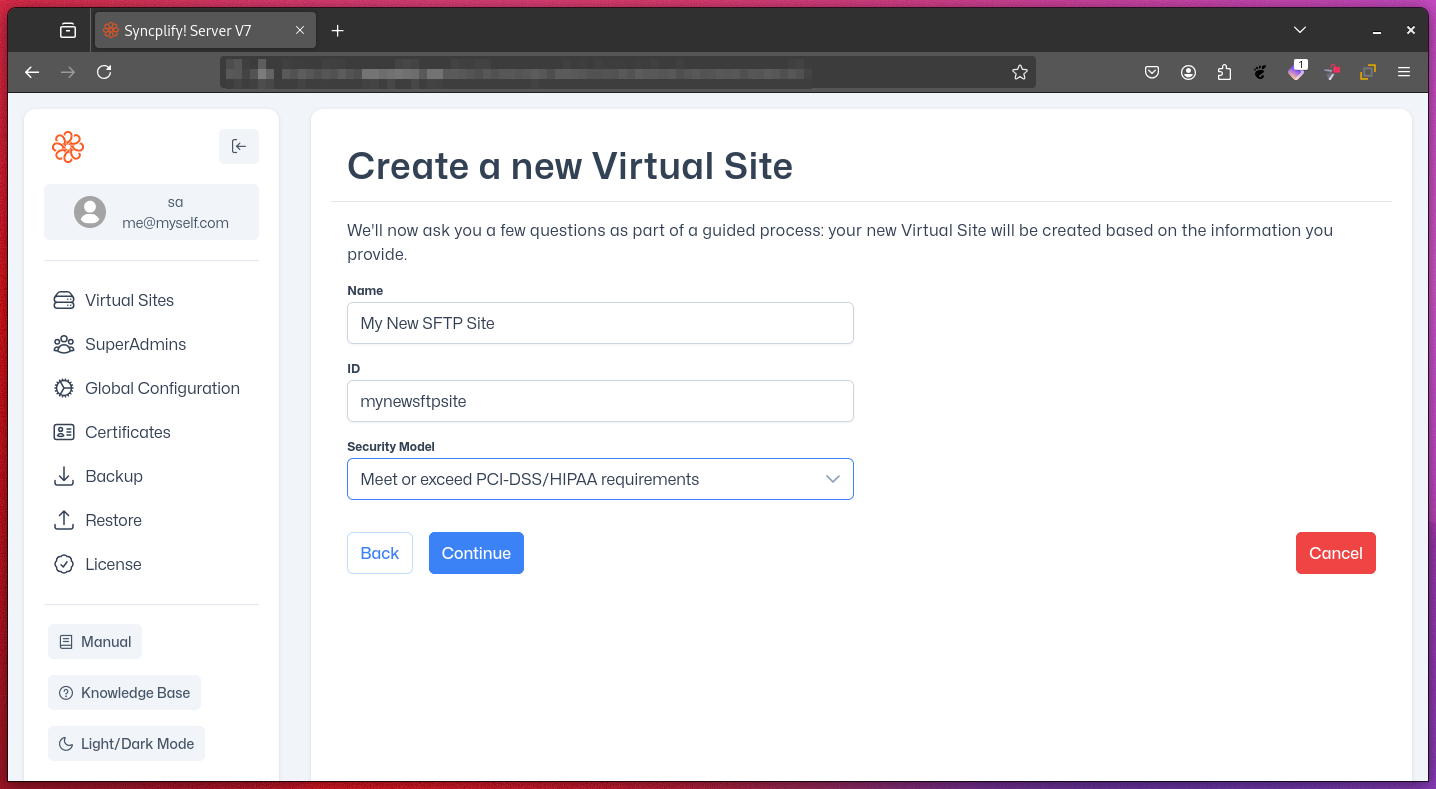
- Name: A "friendly" or descriptive name for your virtual site.
- ID: An alphanumeric identifier (no spaces). It is strongly recommended to use the automatically suggested ID.
- Initial Security Model: Choose among five options:
BASE: Balances good security with broad client compatibilityMAXIMUM SECURITY: Highest security, may limit client compatibilityMAXIMUM COMPATIBILITY: Reasonable security, broadest support for old/legacy clientsCISCO UCM: Tailored for Cisco UCM backupsPCI-DSS/HIPAA: Meets (actually exceeds) regulatory compliance standards
Step 2: Protocol Bindings
Configure the bindings (pairs of IP addresses and ports) for various protocol handlers:
- SSH/SCP/SFTP: Typically listens on port 22, but is commonly found on port 2022 when 22 is already occupied (by OpenSSH or another SSH server). Only needs one port to function.
- FTP(E/S): All protocols in the FTP family require a control port, a data port, and a passive port range. Refer to the FTP protocol RFC for more details.
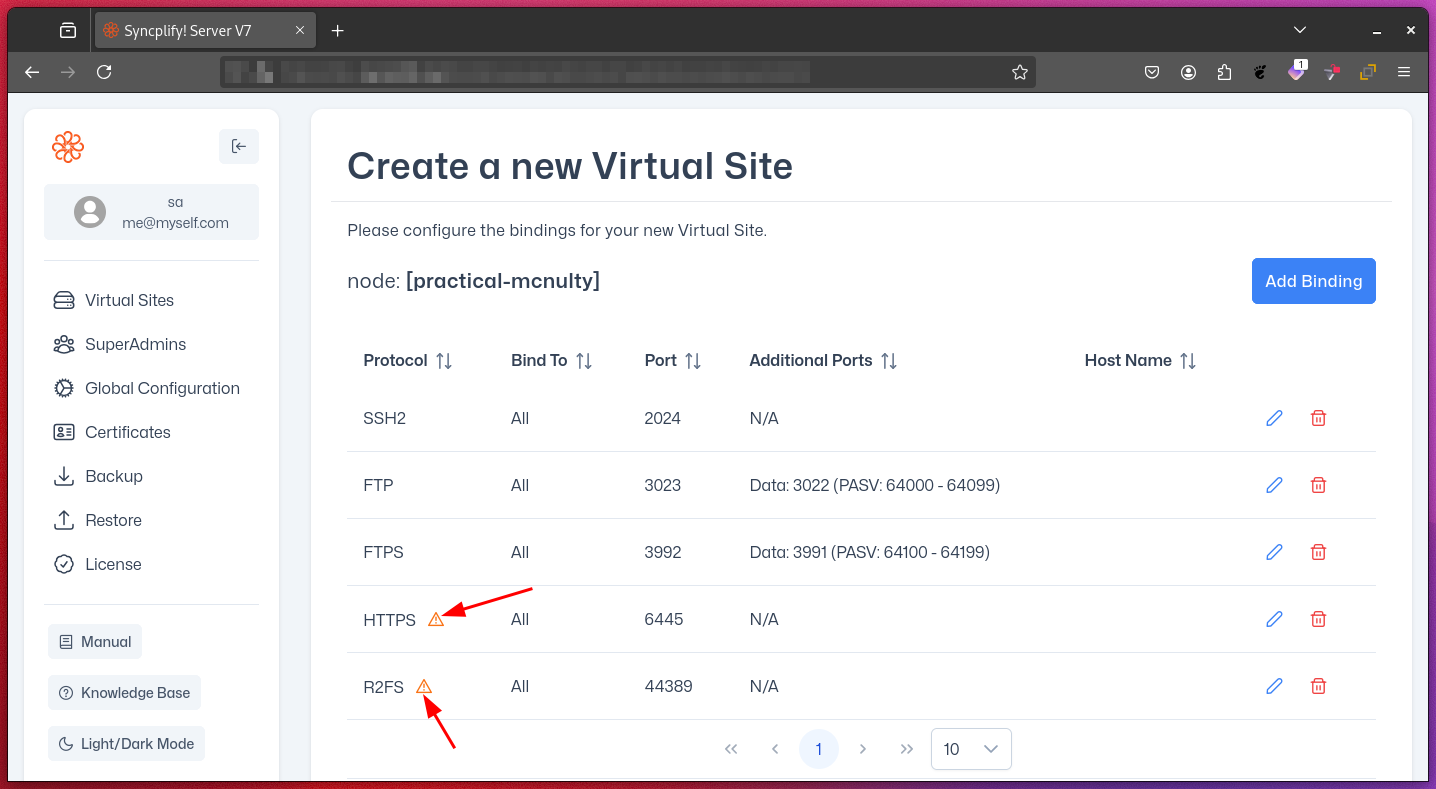
- HTTPS: This is the protocol handled by WebClient!, the web-based secure file transfer and sharing UI built into Syncplify Server!. It is available depending on your license and requires at least a port and a host name.
- R2FS: This is the binding used for Syncplify's Reverse Remote File System (R2FS) software. There can only be one R2FS binding per virtual site, and it requires only one port and a host name.
NOTE
Leaving the IP address empty or using 0.0.0.0 means "all IP addresses available on any network interface attached to the system."
IMPORTANT
Small warning icons may appear next to protocol indicators until all required parameters are filled. For example, TLS-enabled protocols require a hostname for Server Name Indication (SNI) functionality. Once all bindings are correctly configured, the warning icons will disappear.

Step 3: Admin Profile Creation
Enter the details for the virtual site's first Admin profile:
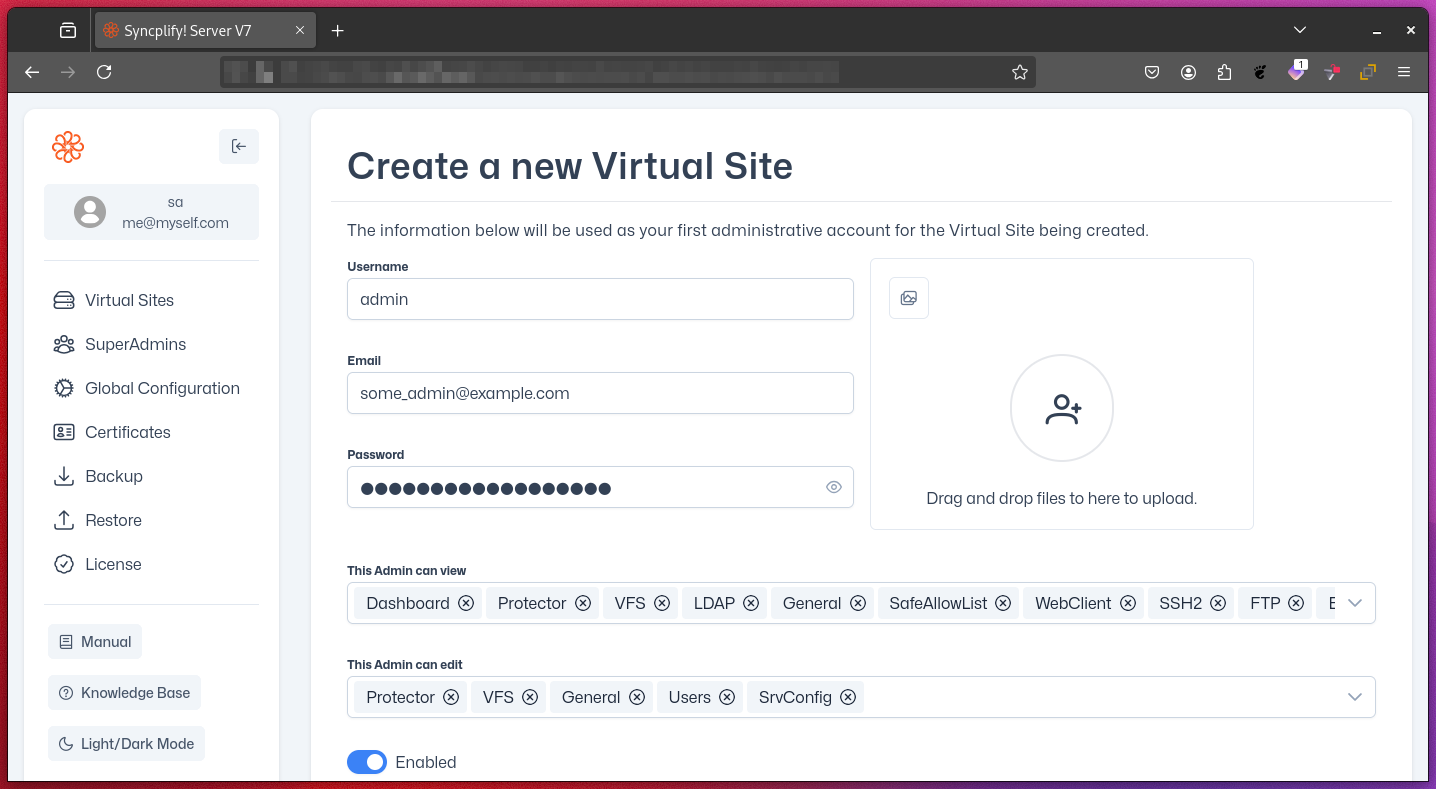
- Username
- Email address
- Password
- Profile picture (optional)
- Specific permissions
Step 4: Configuration Review and Creation
- Review a printable summary of all chosen settings.
- Click the CREATE button at the bottom of the page to finalize the creation of the virtual site and its initial Admin profile.
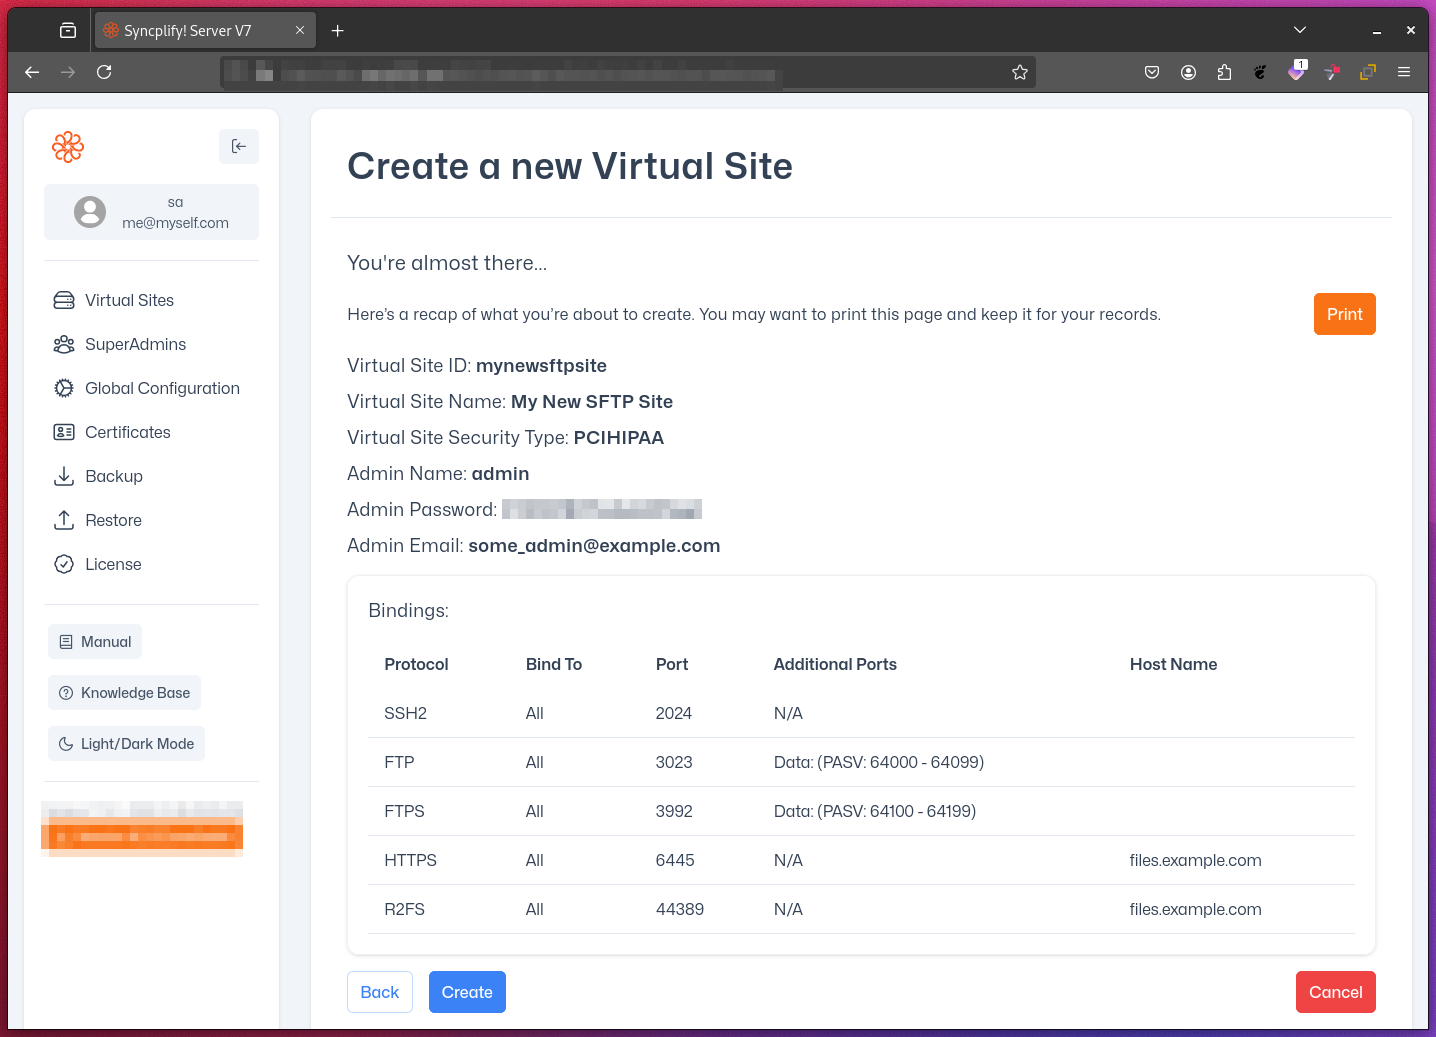
IMPORTANT
It is highly recommended to print this summary page and store it securely for future reference.